Training Details
-
Primary MuscleBiceps
-
EquipmentBarbell
-
LevelEasy
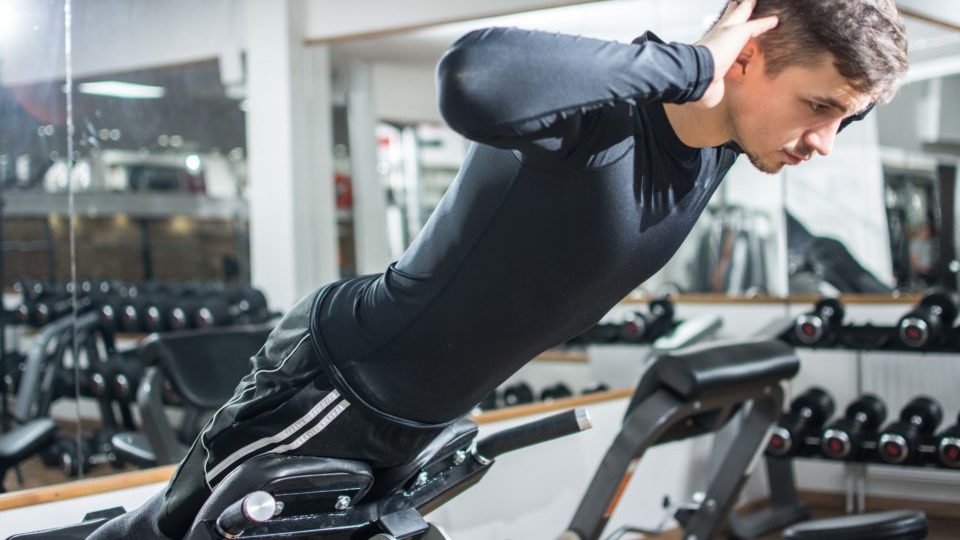
Why should you do spider curls?
Spider curls are a good isolation exercise for the biceps because the oblique bench disconnects your shoulders from the movement, thus the biceps are the only muscle that will be able to work up the bar.
Guide for Spider Curls
- Your arms should hang outstretched straight down, vertically against the floor before you start curling
- The backrests on the bench should end approximately at your chest muscles
- Your elbows should be fixed throughout the movement
- Load up on the eccentric and really control on the way down for every single rep.
- Stay in the top position for 1-2 seconds to squeeze your biceps
- You can perform the exercise with both barbells and dumbbells